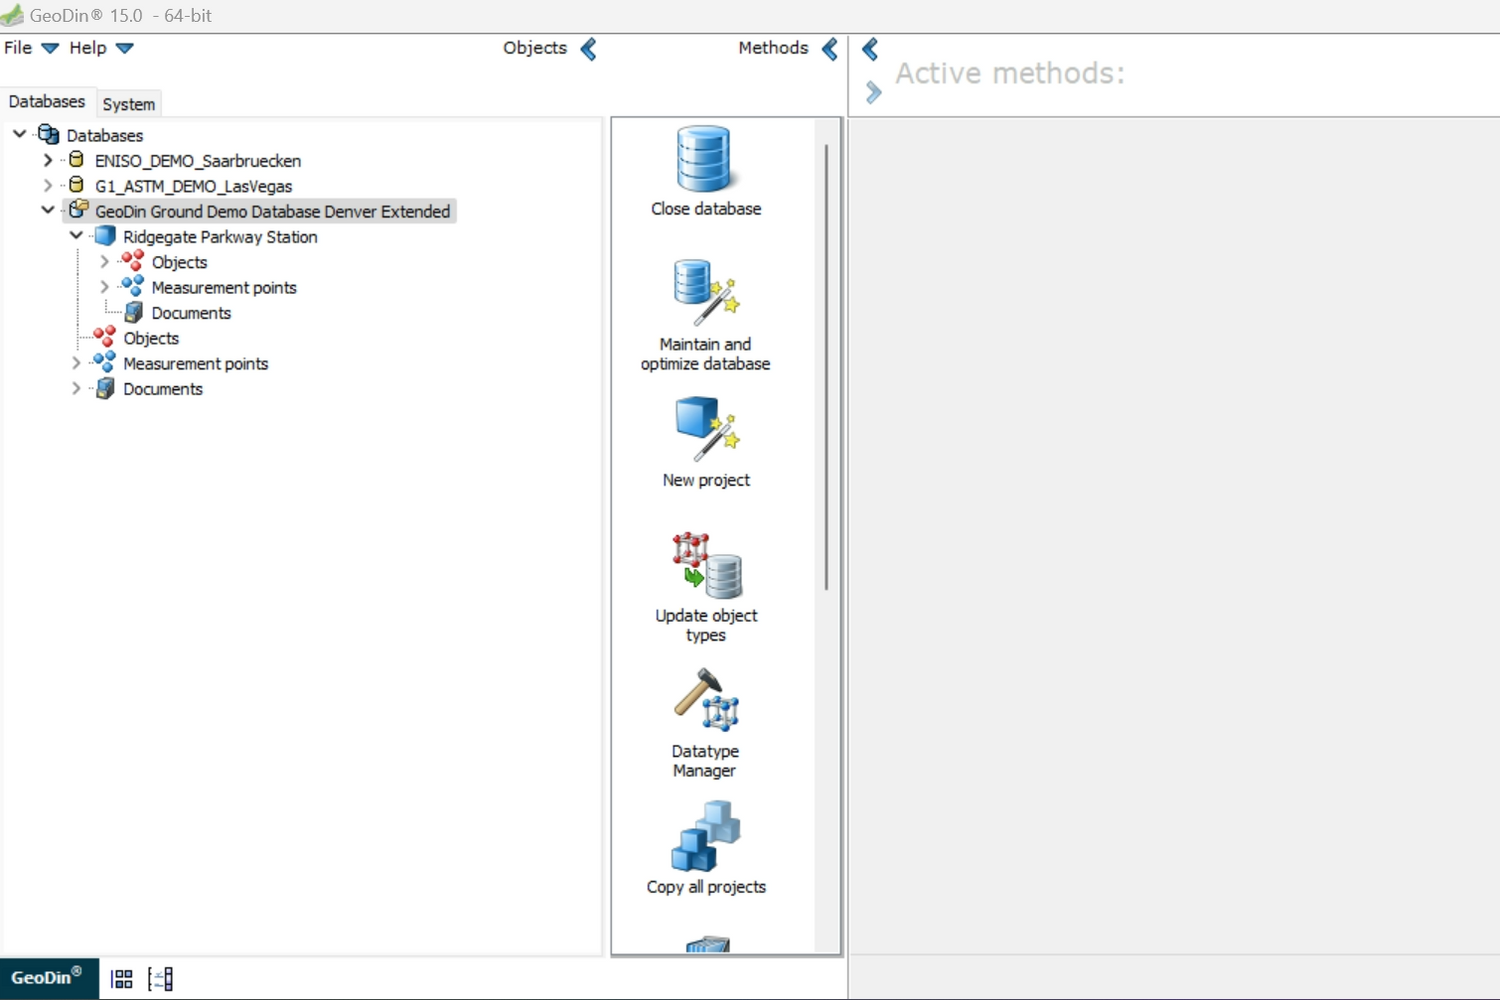
How to insert Geodata in Civil 3D with GeoDin Ground plugin
The GeoDin Ground plugin provides a solution for civil and design engineers that seek to incorporate geological data into Civil 3D, an Autodesk software. For design engineers, the ground often remains unknown, and yet, it is so important to understand what's beneath the ground in order to build a strong design.
We are excited to show you how the GeoDin Ground plugin works with Civil 3D. The
GeoDin Ground plugin is built by GeoDin and Autodesk. GeoDin is a geodatabase
software that helps build and manage a single source of geodata. This streamlines collaboration, centralizes data, and enhances the efficiency of design and construction projects.
With the integration of ground data in Civil 3D, a comprehensive solution is offered to the challenges faced by design teams and geotechnical engineers. Traditional methods, relying on email and PDF documents, can be time-consuming and fragmented. In this blog, we will guide you through the steps of how to get ground data in Civil 3D, by using GeoDin Ground.
*Commands and instructions will change with updates.
Getting started

1. Open GeoDin
Load the project data the team is working on.
This step ensures that the factual data matches the visual data that will later be viewed in Civil 3D.
P.S. Don't have GeoDin yet? You can start your free trial here.

2. Verify borehole information
Navigate to Objects > All Objects to view the detailed
borehole information.
Here you can find information such as: Location name, Project title, Report number, Client, Method, Purpose, Area, City, and Country.

3.Open Civil 3D
Ready to visualize your ground data? Launch Civil 3D.
The GeoDin Ground plugin can be accessed through the Civil 3D ribbon.
Here you can manage data selection or already select the data you have loaded.

4.Select locations
Click on Select data to load the project data you want to visualize. Here you can choose the boreholes from the project that you would like to vizualize. Once you choose the correct ones, click "Draw Boreholes" to load the borehole coordinates.

5. Borehole metadata
After drawing the boreholes, you'll be able to see the metadata connected to each of the boreholes. For example, here you can see:
- name of the borehole
- depth
- elevation
- diameter
As well, you can read the specific characteristics of the different layers that make up the borehole, such as: chalk, limestone, clay etc.

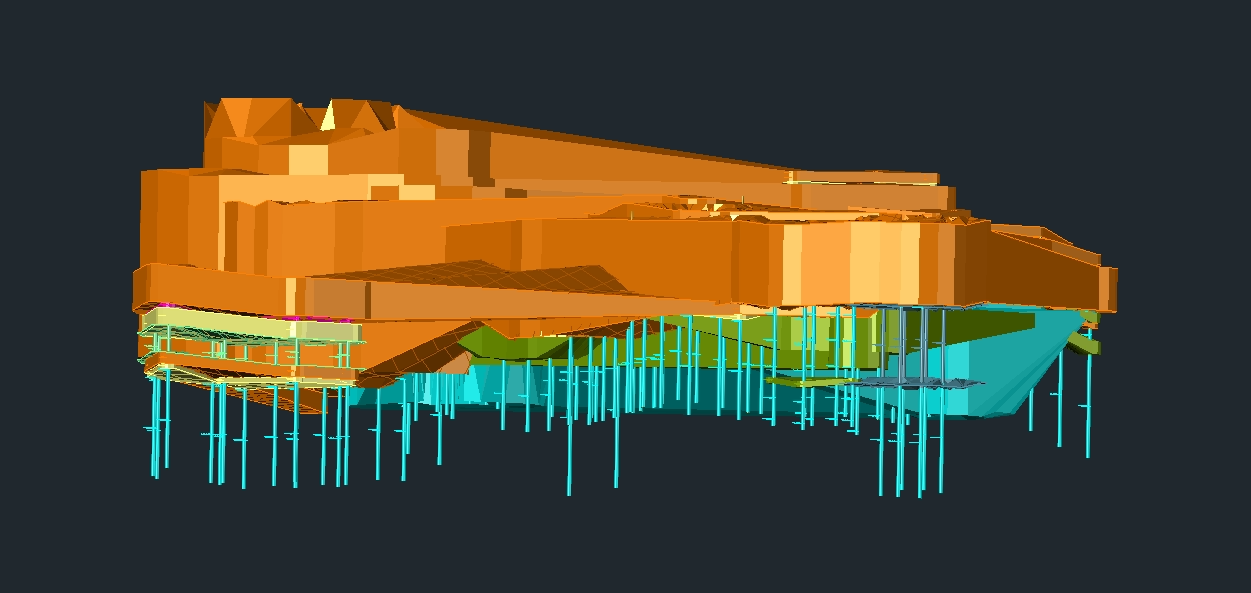
6. Draw surfaces and volumes
Click the "Draw Surfaces and Volumes" button to create 3D surfaces based on the lithological data. This command calculates the surfaces between all the boreholes and creates a surface.
This command helps you to visualize specific borehole locations with lithology, represented by different colours which correspond to the different types of layers in the ground (e.g., clay, sand, stone).
The GeoDin Ground plugin is a valuable tool for integrating geological data into your designs.
By combining visual representations with factual information, you can gain a deeper understanding
of subsurface conditions and make more informed design decisions. GeoDin Ground enables a seamless integration of ground data with Civil 3D, which provides clear visualizations of borehole data.
Check out our video tutorial
Question? Comment? Let's talk.
Connect with our team
On our Social Media, we're sharing regular updates on our Team and anything that's new within GeoDin®. Also, you can meet our dedicated team members. Follow our page and connect.